Tuesday, October 22, 2013

It's a Great Day for DIYs


Woke up with crafty projects on my mind and as luck would have it you get to journey with me as I show all the goods on Great Day Houston this morning. 


Duck Taping It


  • Pull tape the entire length to the belt buckle so the majority of the belt will be wrapped with one consistent piece of tape. 
  • Lay belt on top with the front side down toward sticky part of tape. 
  • Next tear tape into custom pieces to fill remainder empty spots. 
  • Use an ice pick or large needle to puncture hole in tape after you wrap belt. 
  • * punch hole from the front to back so the tap will go inward to back of belt. 

T-Shirt Time 

  • Take an old t-shirt fold into half and then half again. 
  • Cut 1' strips (that look like a big ole loop) stretch it out like you are shooting an arrow. 
  • Then wrap around your hand 4x to create circles. 
  • Make at least 14 circles. 
  • Take two circles and tie them with an extra small strip of fabric. 
  • Continue to you have attached all circles, on the last circle attach it to the first circle you started with. And Voila' you have a rad scarf perfect pairing with an awesome outfit. 


Re-purposing a Bill Cosby dad sweater


I was bummed when I realized I didn't have an old dad sweater but then I thought I love thrift shopping, i'm sure to find the perfect sweater at the goodwill for cheap and there it was... my Bill Cosby looking sweater. SCORE!!!! I got it and one more sweater to create a fabulous looking sweater vest for the fall. And this is how to achieve it...

  • Grab your sweater and spread it flat on a table.
  • Create a pattern on top with a thick marker, draw across the collar, along the armpits, down the side and across the bottom.
  • Grab your (sharp) scissors and start cutting along your pattern
  • When you're finished, it's all about how you put it on -- put both arms through the circle and let it fall like a vest!
*to create a longer vest get a bigger size sweater than you normally would wear. to do a cute cropped vest cut try using a larger sized kid sweater. Thrift stores are perfect for this DIY one you can find tons and too they're cheap without the emotional attachment so if you mess up no biggie. 

Click here for my mirror mirror segment where I do the same technique with a t-shirt! 


Chain Weaver


  • Grab that old chain that you never use anymore and spruce it up with colorful thread.
  • Take at least three to four pieces of thread and gather evenly on one end and tie a knot with them 1/3 from the bottom of chain.
  • Begin twisting or braiding thread through loops.
  • When equal on other side, cut and tie off. 
Cuteness just happened, you're welcome.

*Taping ends of threads together will help you weave through the chains a lot quicker after you knot it off at one end.


Paperclip Dangles 


  • Grab a paperclip and shape into a triangle or any shape you like. Its sturdy enough to manipulate to a shape you desire. 
  • Next apply glue on paperclip this will allow the thread to stay in one place and not slip around. 
  • Tie off end of threads (I would have at least 3 strands to help process go faster.) 
  • Wrap the outer edge of triangle and then go across to create a solid space. You could also to random zig zags across triangle to shake things up. Don't limit yourself to one color mix it up and make it yours. 
*adding adhesive dots in places that seem to be unraveling will help clean it up, not get messy and after you can cover with thread.


Had a great time with Debra as always!


Until next time...


kjoy

PS if possible I'd love your thoughts and comments. :) xo

Tuesday, September 17, 2013

the penny series

pennyfight. pennyfree. pennyfly.

the back story.
For the past 6 years, I've been making random jewelry pieces for myself and others. I've always wanted a jewelry line but never could find a concept I could stand behind. Then an opportunity came up through my church! I was praying, trying to figure out an idea for pieces to sell and that's when I started thinking about the penny. Through my personal journey of accepting and loving myself, and remembering my value, I thought of the penny and how a penny never loses it's value no matter where it's been. It's still worth something.
I've always had a connection to the words “fly” and “free” and thought of “fight” to bridge the concept together; that sometimes you have to fight to be free in order to fly. Putting these two ideas together, I wanted to create meaningful jewelry.


The Penny Series

 pennyfight. pennyfree. pennyfly.
fight: you have to fight to be free.
free: you have to be free to fly.
fly: now it's time to fly.

My hope is that in whatever part of your journey you are in, you would fight to be free and fly, through loving yourself and others. That the pennies would be a constant (and cool) reminder where you've been, where you are and where you are going. How it speaks to you is uniquely yours and tells a beautiful story and I can't wait to hear them all!!! :)

Portion of the proceeds will go to women who have been rescued from human trafficking and hopefully one day I can employ stay at home moms. (You know my sis Stace was my inspiration for that :)
I'm launching the penny series this week at the Lakewood Woman's Fall event and within the next week should have the pennies and some other pieces from my new company 33 on etsy. I will most definitely post a link once its up. 
Just a quick shout out, there is no way i could have done this without my friend Ari, thanks girl for everything and i mean everything.

Also want to thank my sweatshop crew which includes Ari, Liz V., Sherene, Liz Jordan, Falon, Carla, Caroline and my beautiful mom.

the crew
the wise prize

more cuties sporting the pennies


and so it begins the beautiful blessed journey.


kjoy

ps because i've had this question alot, it is not illegal to stamp or repurpose pennies but you cant use them to try and buy something. (but why would you bc they're so awesome :)


Tuesday, July 30, 2013

I'll put a Hex Nut on You.


I love trending jewelry but dear lord it can be crazy expensive. Check out my latest Mirror Mirror segment where I turn hardware hex nuts into crazy awesome jewelry. I promise it won't disappoint!

>>> HEX NUT JEWELRY...YES PLEASE <<<

Hex it Up

  • Create your design with any color of hex nuts. You can paint them to change it up with nail polish.
  • Glue the sides of your hex nuts together into the shape you want. I totally love E3600 glue, it allows you to mold design but it also works to keep pieces of metal together. Let it dry.
  • Attach a large jump ring to sides of your design and attach a chain to the jump rings. The length of chain depends on if you are making a necklace or bracelet. Attach a clasp and you got yourself a fancy pancy piece of jewelry. 

To Braid or not to Braid That is the Question.

  • Cut three very long pieces of twine, thin rope, or thick string and tie it off and wrap with tape so it doesn't unravel when you start to braid.
  • Before you start to braid attach the end of strings to a pillow or tablecloth to stabilize it. Now let the braiding begin.
  • Braid the strings half-way down.
  • Lace one hex nut on center string then cross over like you would braid regularly then lace another hex nut on the center and cross over. Keep adding until you desired length. I did 16 nuts on my bracelets.
  • Continue to braid without nuts and tie off at the end.
  • Cut off any frayed strings from ends and put that bad boy on and work it. :)
I love finding things and repurposing them into something awesome.  Hardware is not just for boys, just sayin'. 

Stay awesome because you are awesome. 

kjoy

Saturday, June 22, 2013

link chain washer love

Ok I'm in love with these chain gang layering necklaces...perfect pairing for any outfit. Watch my latest segment by clicking on link below. You'll see how easy it is to throw down and look freaking awesome. Side note the flower necklace DIY would be a perfect craft for any little lovebug girls in your life...next time I see my Maddie Joy (my 5 yr old niece) it going to be a DIY par-tay. :)

>>>Link Chain Layering Necklace Segment<<<


LINKS AND CHAINS NECKLACE
the finished look


  • 1 large washer
  • 8 medium washers
  • 8 small washers
  • Jump Rings
  • Jewelry Pliers
  • Necklace Clasp (optional)

small medium large washers
  • Grab a large washer-open a jump ring-attach it to the washer- then lock it up.
  • Grab the smallest washer-open jump ring-attach smaller washer-link small washer to the jump ring on the large washer you just locked up.
  • Do the same with medium washer- repeat pattern until you get four small and four medium washers on the largest washer.
  • And the pattern goes... Jump ring - jump ring - small washer - jump ring - jump ring - medium washer - jump ring - jump ring - small washer.
  • Repeat steps on the other side of largest washer.
  • When you are done with all the meticulous steps...whew! Attach chain (any length you choose) with jump rings to create your fantastic looking layering necklace.
Happy linking.

kjoy

Friday, May 24, 2013

Hardware Gone Awesome


This DIY has to be my absolute favorite...seriously. I wear these gems almost everyday and the best part about it, its so easy to make. Check out my latest mirror mirror segment via the link below.

>>> MIRROR MIRROR DIY HARDWARE JEWELRY SEGMENT <<<

Hinge Bracelet 


  • cut two three-inch pieces of chains possibly shorter if you have thinner wrist. lucky you. :)
  • attach the end of chain to the side of one hinge using one jump ring and attach the other end of that chain to the other side of hinge. Repeat on other side.
  • in the center of the chain on one side, attach a jump ring to the center link, repeat on other side.
  • on one end attach your clasp to the jump ring.
  • now you are ready to clasp and go. 

Chevron L-bracket Necklace


  • grab your brackets and determine length of chain between both. make sure they are the exact same in length on both sides so it doesn't go lopsided on you. 
  • connecting the brackets to chain using jump rings.
  • attach a jump ring to the end of the chain and attach the top bracket, repeat on other side.
  • cut chain at the center and attach a jump ring to each cut side of the chain.
  • attach a clasp to one of the sides and you're done and doner!


For less than 5 bucks and in 5 minutes to make, I call that a totally win! 


Kjoy

Ps i would love to hear your feedback! xo

Friday, May 3, 2013

Leather Love and Polka Dot DIY

You know that old sweater you're yawning over or how about those also pants that are looking rather dull??? are you thinking of throwing them out well hold your horses and check out link below to resuscitate your dead wardrobe back to life back to reality! 


Click on the link below for my latest Mirror Mirror segment, we'll repurpose and spruce up those almost Salvation Army worthy pieces.

>>>LEATHER LOVE AND POLKA DOT DIYS<<<


Leather it up! 

What you're going to bring to the Leather DIY party:

  • An old cardigan or t-shirt
  • Faux leather fabric for the cheap route, real leather if you bringing your big guns. If you get an eighth of a yard on sale its like a buck and you only use a wee bit...so cheap.
  • Scissors
  • Thick Needle (i love working with thick needles because the eye of it is so easy to thread)
  • Upholstery Thread- you can either match thread to the fabric or use some funky cool colored thread to add interesting detail.
garment in need of love

supplies: faux leather, thread, large needle and scissors

you don't have to stick to threads that match the leather, branch out with color to add funk and interesting detail

How to:
  • Cut the appropriate size and shape of leather depending on what you are going to leather up. ie elbow patches, shoulder patches, pocket squares, ect.
  • Thread your needle and tie a knot in the end.
  • Start sewing your fabric onto your old clothing piece. Start on the inside of the clothing item. If you are covering a pocket work in a U shape.
  • After you're finished sewing, tie off the thread on the inside of the garment.
stitching doesn't have to perfect its like a monet, up close its a mess but from a distance its beautiful

finished look is too cute


Do the Polka!

What you're going to bring to the Polka dot DIY party:
  • Old pair of pants in any color, shape or size. (or another article of clothing)
  • Fabric "Paint" Pens 
  • Ruler
supplies: old pants, ruler and a fabric paint pen

this is what the pens and paint look like...you're welcome. 

How to:
  • Lay your pants or clothing item on a flat surface and smooth out the wrinkles.
  • Lay your ruler across the garment where you'd like your dots to be. 
  • Make dots an inch apart all the way across, this is going to be your starter line that you will use to make the dots consistent throughout the garment.
  • Move the yard stick down about an inch and make dots and inch apart again, BUT this time make sure the new dots are IN BETWEEN the dot you just made. Its super duper simple. You got this!
  • Finish the front and let it dry and then do the same steps to the back side.
    finished look i've seen everywhere...the gap, khols, nordstrom oh yeah
Now aren't you glad you did give the ole heave ho to those dulled down pieces? I mean you wouldn't have gotten the chance to work that leather & polka dance those pants off!

Happy DIYing.

kjoy

Thursday, April 25, 2013

British Colonial Retreat

The Slater family recently left a huge home in the country of 17 years to downsize to a more manageable home in old town Katy. Sometimes coming into a new place with a bunch of old things can seem overwhelming but a little thinking outside the box can transfer standard boxed room into something truly unique.


So here's the break down of what i did with things they already owned in their house. All they would need to buy now is bedding. thats a total win.

  • I added an 8x10 old rug to bring color to the room it fit like a glove.  This concept has become my new obsession and i might have to add this element to every home i set my hands to decorate. Rethinking the placement of this rugs is also a great way to repurpose an old rug.  
  • Old rugs can be overwhelming in color or dated in design, so my tip is flipping over the rug so you get a muted version of it that can be less daunting in your makeover adventure.
You can see here the difference in the sides of the carpets. 
  • After laying carpet down i set up antique twin beds they had in storage. Instead of using a head board and foot board I used the two end pieces to create a daybed. I secretly want to shove this amazing bed in my purse and take in home with me. I love it! 
  • i took them apart and added white shutters (that the Slaters had bought at a thrift store) to the walls instead of using them as blinds I repurposed them as art to set off the bed bringing dimension to the room.
  • I took a table they were using as a tv stand in another room to add as a night stand. The height of table is perfect because its high enough to be able to reach over bed post bars.

  • I grabbed this beautiful desk they had in the master hiding under a tv, its so perfect in this little room of adventure. It makes me want to go old school and write a handwritten love letter to someone. Old sap right here. 
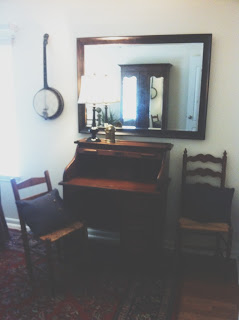
  • One of my favorite things is to add as many personal items in a rooms as possible. You want to make your home feel like a. someone lives there and b. you're that someone. I hate going into home where it looks like someone walked in a room and bought the whole set...gag. Sorry if thats you but seriously its so boring.  I asked the Slaters if they had any instruments in their house that i had not seen, (most people have instruments are in their cases collecting dust, so its just not you, you're in luck there are others) and they did. i love bringing them into the design because it adds funk and hopefully inspires the owner to pick up and get their groove on. So insert their banjo... which has to be one of the coolest looking and playing instruments out there. I swoon for banjos. 
  • I then grabbed the armoire that was in the other room with a queen bed and brought it into the room. It fit better in this space because of the smaller bed and because of the size and it's function, it grounds the look. I personally think are like an oversize travelers trunk. 
  • Found this boat baskets in storage, we were going to use for bread, and decided they'd be better on the wall. Carbs will kill you. :) 
  • The more interesting non-matching lamps the better. Using lamps instead of over head lights literally will change the feel of the room. It will bring a glow to one's face rather than beating down on one's head.  
  • Lastly I grabbed a live plant to tie up the room. I'm a totally advocate for adding live plants to  rooms to reminds us that we are among the living not the dead. It also brings color and freshness to a dull or an older home. 
In 4 hours beautiful transformation can happen, just have an open heart and mind and who knows what you will create.  

Happy travels even if its to the other room.

kjoy